Google Tag Manager simplifies the management of various third-party statistical tools. Besides adding this cookie, it's crucial to include cookies for each third-party statistics tool connected via Google Tag Manager, such as "Google Analytics."
Let's explore how to install GDPR-compliant Google Tag Manager on your WordPress site with the assistance of the MyAgilePrivacy plugin.
Solution 1 - automatic scan
You have the option to utilize the advanced "Cookie Shield" feature, which can automatically detect this software.
Simply set the Shield to "Learning" mode, browse your site's pages, and your configuration will be ready.
Alternatively, manual configuration is also available.
Solution 2 - manual configuration
Part 1 - locating the code of Google Tag Manager
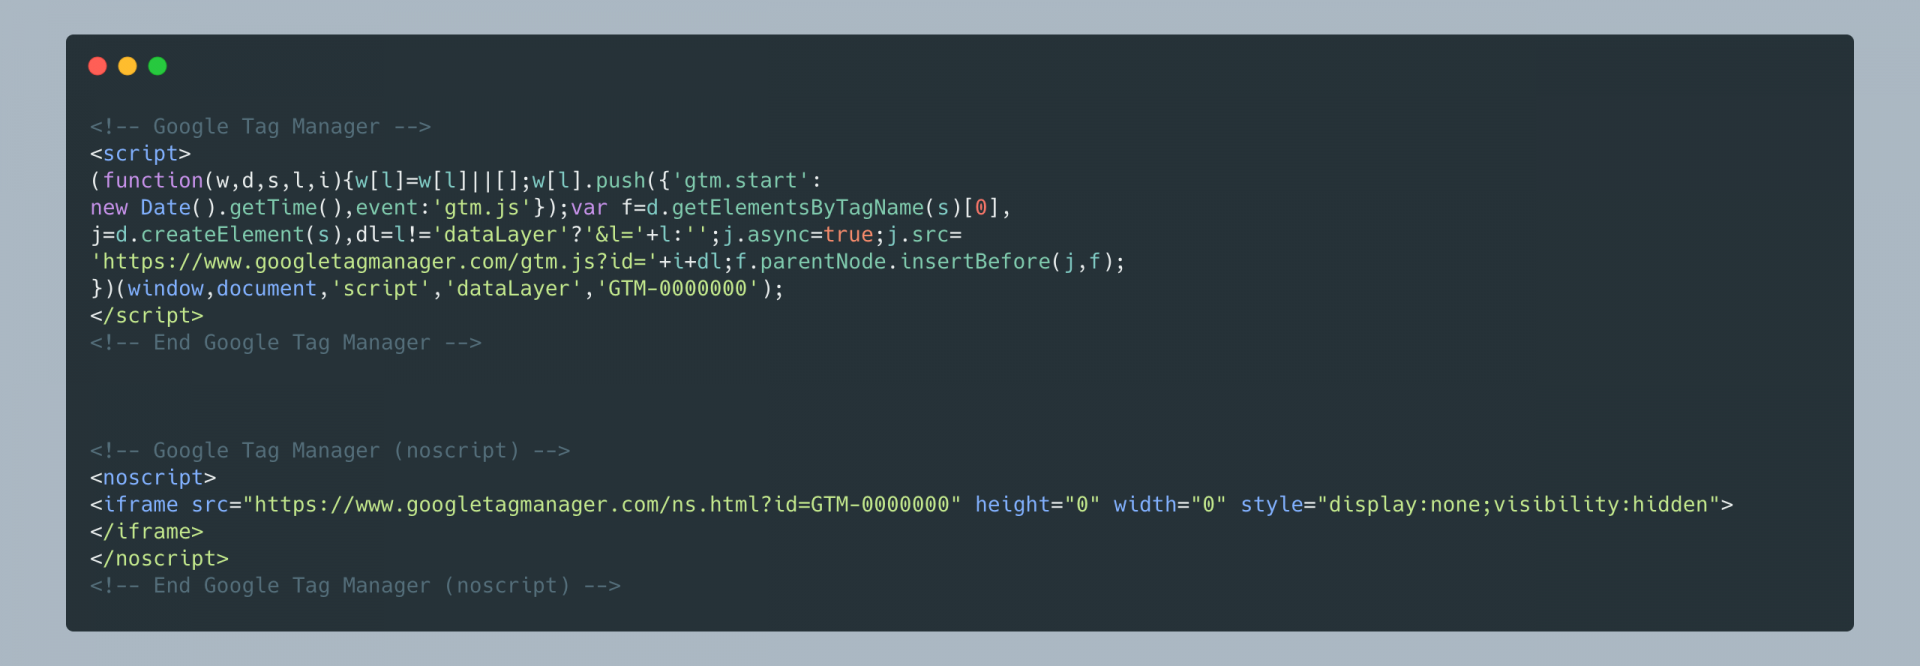
As a first step, locate the Google Tag Manager code.
It will look something like this below:

Part 2 - Locating the Cookie for the Google Tag Manager on the MyAgilePrivacy Cookie List
In your WordPress website admin, navigate to: MyAgilePrivacy -> Cookie List from the left menu.
Here, you'll find the list of cookies imported upon plugin installation. Initially, they'll all be in a draft state.
Your task is to publish only the cookies relevant to your website.

On this screen you will see a series of columns:
- Cookie Name: the name of the Cookie
- Is Necessary: indicates whether or not the cookie is essential to site navigation. If rejecting the cookie makes the site unusable, then it is essential. You will find this information pre-filled in the cookie details.
- Auto Update: indicates whether the cookie reference text (which we will see in a moment) remains automatically updated or not. If the setting is on "yes," we will automatically take care of updating the cookie reference texts to keep everything up to date according to GDPR regulations.
- Installation Type: tells you the insertion type chosen for the cookie. This value will be changed depending on the type of inclusion needed, and we will see this together within the guides.
To install the Google Tag Manager cookie, search the list for the one with the title "Google Tag Manager (Google, Inc.)" and click on it.
The detail page contains pre-filled informational text and 2 blank fields where the code can be entered.
The pre-filled text is visible in the cookie policy, and it is that information that is automatically updated to be up-to-date and compliant when the "Allow Automatic Update" setting is set to "yes."
Immediately below the text, you will find the option to select the "Type of Installation" (Javascript and Noscript, or Raw).
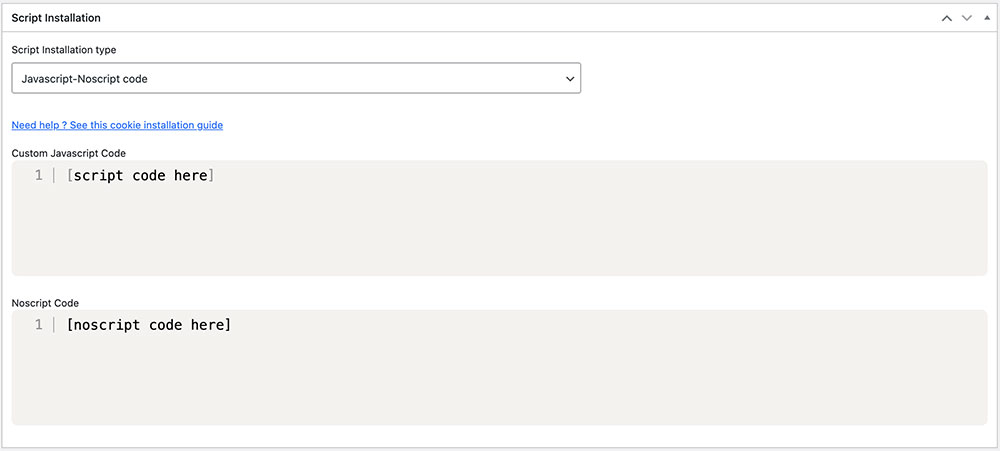
Leave "Javascript-noscript code" selected, and you will see immediately after 2 fields:
- Javascript Activation Code - where to enter the main code for Google Tag Manager
- NoScript code - where to enter any NoScript code

Part 3 - Entering the Google Tag Manager Code
Now all you have left to do is to enter the Google Tag Manager code, identified at the beginning, inside the two fields, according to the directions in the image below.
To do this correctly remember that you must enter the code WITHOUT the opening and closing tags <script> e </script> and without the opening and closing tags <noscript> e </noscript>.
Remember to save and publish the Cookie by pressing the blue "Publish" button in the upper right corner.
Final part - verification of proper operation
To verify whether you have correctly installed Google Tag Manager on your website, you can use the tools provided by Google or individual third-party tools configured on Tag Manager. Alternatively, feel free to contact us for further assistance.


