LiveChat is a service enabling real-time chat between users and operators, or, in the operator's absence, allowing users to leave their details for follow-up via email or telephone (based on configuration). As this system entails handling sensitive data and installing cookies on users' browsers, it falls under the regulations of GDPR and the Cookie Regulation.
In this article, we'll explore how to install GDPR-compliant LiveChat on your WordPress site using the MyAgilePrivacy plugin. Here's a step-by-step guide:
Solution 1 - automatic scan
You can leverage the advanced "Cookie Shield" feature, which automatically detects this software.
Simply set the Shield to "Learning" mode, browse your site's pages, and find your configuration ready.
Otherwise, you can use manual configuration.
Solution 2 - manual configuration
Part 1 - locating the code for the LiveChat widget
As a first step, locate the code to install LiveChat on the site.
It will look something like this below:

Part 2 - Locating the Cookie for the LiveChat Widget on the MyAgilePrivacy Cookie List
On your WordPress website admin, from the left menu, go to: MyAgilePrivacy -> Cookie List
You will find the list of cookies that were imported when the plugin was installed.
Initially you will see them all in a draft state. You will have to post only the cookies on your website.

On this screen you will see a series of columns:
- Cookie Name: the name of the Cookie
- Is Necessary: indicates whether or not the cookie is essential to site navigation. If rejecting the cookie makes the site unusable, then it is essential. You will find this information pre-filled in the cookie details.
- Auto Update: indicates whether the cookie reference text (which we will see in a moment) remains automatically updated or not. If the setting is on "yes," we will automatically take care of updating the cookie reference texts to keep everything up to date according to GDPR regulations.
- Tails: initially this column is empty. It shows you a preview of the code that is associated with each cookie. Just as we are about to do now with LiveChat.
To install the LiveChat widget, search the list for the one with the title "LiveChat Widget" and click on it.
The detail page contains pre-filled informational text and 2 blank fields where the code can be entered.
The pre-filled text is visible in the cookie policy, and it is that information that is automatically updated to be up-to-date and compliant when the "Allow Automatic Update" setting is set to "yes."
Immediately below the text, you will find the option to select the "Type of Installation" (Javascript and Noscript, or Raw).
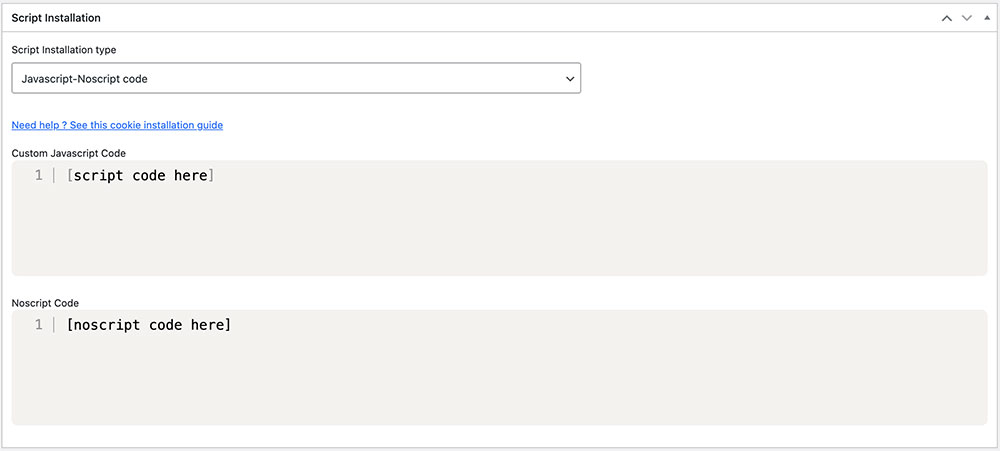
Leave "Javascript-noscript code" selected, and you will see immediately after 2 fields:
- Javascript Activation Code - where to enter the main code for LiveChat
- NoScript code - where to enter any NoScript code
Part 3 - Entering the LiveChat Widget Code
Now all you need to do is enter the LiveChat code, identified at the beginning, within the two fields, according to the directions in the image below.
To do this correctly remember that you must enter the code WITHOUT the opening and closing tags <script> e </script> and without the opening and closing tags <noscript> e </noscript>.
Remember to save and publish the Cookie by pressing the blue "Publish" button in the upper right corner.
Final part - verification of proper operation
To verify if you have correctly installed the LiveChat Widget on your website, you can utilize the tools provided by Google or LiveChat. Alternatively, feel free to reach out to us for further assistance.
Upon loading any page on your website, you'll notice that the LiveChat widget remains inactive until you explicitly give consent to the installation of the cookie. This can be done by clicking "I agree" on the cookie acceptance bar or by navigating to "Customize" and activating the LiveChat cookie.


